
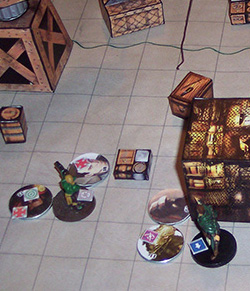
Reusable Status Effect Markers
If you've read my guide on cheap minis then you'll already have a number of miniatures to play with for only a few bucks. Next, you may want a way to track the status or condition of these minis, which is easily accomplished using similar techniques on a stickier and reusable medium: magnets.
What you'll need
- Magnet Sheets
: $10 for a pack of 5, more than you'll ever need.
- Scissors: $2 if you don't already own some
- Glue Stick: $1
- Printed Paper: Either you already own a printer or can get about 0.10c a page at a local print shop
Total cost for 100 markers: $13.
Setting up the Template
 The first thing to do is set up your Photoshop/GIMP file in order to create your markers. If you don't want to be bothered, you can download the PSD files I've already made: PSD (CMYK) | GIMP (RGB)
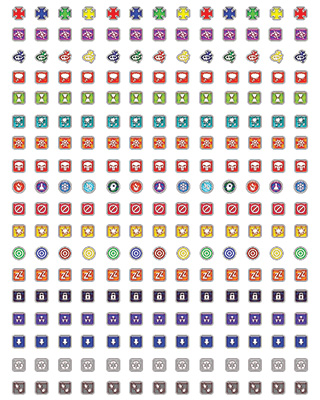
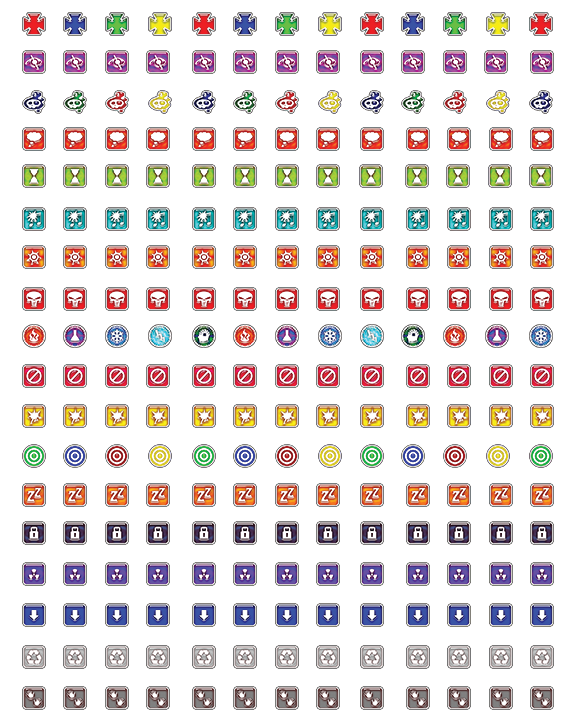
If you just want something to print, try this image file instead: Icons (PNG)
If you're skipping this section, start reading at Printing the Markers below.
Create a new file in Photoshop, you can select the preset for U.S. Paper to get a document the size of a piece of paper (assuming that's what your printer uses) or input them manually: 8.5 inches wide by 11 inches high. Make sure the color mode is set to CMYK instead of RGB, since that is the color mode printers actually print with so what's on your screen will more closely resemble what ends up on paper. Make special note of the resolution field, this will be important later and will be a general control for quality. If you set this too high your printer might not be able to get the image quality you want, somewhere in the range of 72 pixels/inch is what I use for simple print jobs.
Now that you have your page size document, you need to decide on which icons you want to use. The downloadable files I linked above have these choices made for you, but if you want more custom icons the main thing you need to keep in mind while searching is that they have to look good or even just recognizable when shrunk down to only a few pixels wide.
When you have an icon you think might be good, copy it into a new file in photoshop; you can just use the clipboard preset in the new file screen (if it doesn't select it automatically) and paste in an image you've copied, or open an image file that you've saved. With that file open, select Image > Adjustments > Image Size (ctrl+alt+i) to open a new dialog, and under Document Size toggle the dropdown next to the width and height fields to inches. Then, in the width and height fields, put in 0.333 so that your image size is 0.333 inches wide by 0.333 inches tall. You may need to uncheck the Constrain Proportions checkbox or crop your image file in order to keep both dimensions the same. To crop the image properly, select the crop tool (keyboard shortcut 'c') and drag a square around the part of the image that you would like to use for the icon. To maintain the ratio (keep it perfectly square), hold down the shift button while dragging the selection box.
 At this point you should either have the image size dialog open already with the new dimensions inputted, or if you closed it to crop the image, open it back up and make sure the height and width both read 0.333 inches. Because you are shrinking the image down to such a small size, it's important to try and maintain as much quality as you can. At the bottom of the dialogue there should be a Resample Image option, make sure that's checked and select "Bicubic Sharper (best for reduction)" from the dropdown. That all complete, hit ok to close the window and resize the image, and you should have your icon sized to 1/3 of an inch. If it looks terrible try another one. Otherwise, Select > All (ctrl+a), Edit > Copy (ctrl+c), and go back to your main status effect page file and paste it in. Do this for all your image files, making duplicates as you like to fill up the entire page.
A good trick for nice clean rows is to go View>Snap and make sure it's enabled, as well as View>Snap To> Guides and View>Show>Smart Guides and make sure all of those are enabled. Now when you drag around a layer you should get some pink lines that snap it in relation to the other layers, allowing you to create perfectly aligned rows and columns of icons.
Printing the Markers
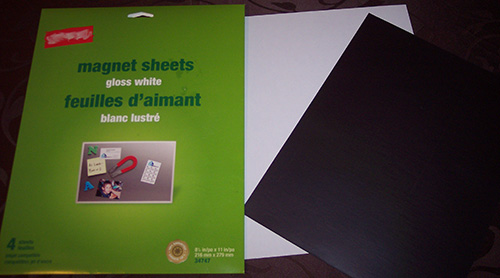 Next you're ready to print out the markers. Depending on the type of printer that you have there are a couple of options: if you're using an inkjet and if you are using the magnet sheets, then they probably mentioned that you can print directly onto them using your inkjet printer. In which case, just follow the package instructions to print your icons directly onto the magnets. Basically, just replace your paper with the magnet sheet, ensuring that it's facing face up if it's a top feed, or face down if it's a bottom feed. Glance at the instructions though to make sure, they may be different from mine.
If you're using a laser printer you'll need to print out onto a sheet of paper and then glue that to the magnet sheet, because the laser printer will most likely burn your magnet sheets. This is also the way I did it, so I will describe the process for gluing the sheets, but if you use an inkjet printer you can skip those steps.
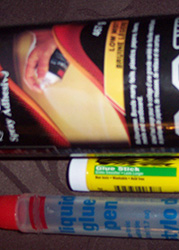 Print out your sheet of paper (if you're using an inkjet you can skip down to Cutting out the Markers down below) and cover the non-magnetic side of your sheet (most likely the white side as opposed to the black) with glue. If you're just doing this project, a glue stick should be fine, but if you plan on doing any sort of heavy gluing in the future (such as for creating tiles) or if you want to make sure that the markers will stick to the magnets forever, then I highly recommend using some Spray Adhesive
. I don't really recommend using a liquid glue pen since it will warp the paper. Spray adhesive is a bit pricier than just a glue stick, but it doesn't warp the paper, is stronger, and you get a lot more bang for your buck if you use it frequently, but it's not really worth it if you're not going to use it very much. Anyway, with your sheet covered with glue just stick the two together, pressing out any bubbles, and let dry. You should probably make sure to line the two sheets up carefully before letting them touch, because you won't be able to readjust it very easily once they start sticking to each other.
Cutting out the Magnets
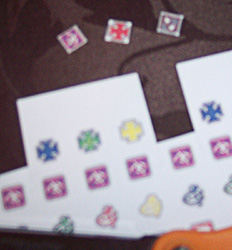 With your magnet sheet all done and covered with icons, you just need to cut them out. If you want to find and purchase a 1/3 inch hole punch you are welcome to, but I just used a pair of scissors. Cut out your icons carefully and they're ready to use. They should work with the washers without any troubles and stick to them well, but if you or any of your players like to use a lot of plastic miniatures then I recommend making a few small mounting points on the minis for the markers. You can do this by putting a tiny amount of Sticky Tack
onto the miniature, which you can find at any place that sells craft or school supplies.
You can also get a small holder for these, like with the washers, to help organize them. Which is a good idea because they are much smaller than the washers and more prone to getting lost. Even just some baggies will do. Also, if you don't have any fingernails, a good trick for picking them up off of a flat surface is to press your finger down onto the face of the marker, and then lift, and they should stick.
You're not just limited to status effects either, any sort of note you want to convey on the washers is perfect for this. After making my initial set for D&D status conditions I also made a set for buffs and tracking things like height (great for flyers), the corners of zones, tiny creatures (especially if they like to crawl all over you), or miscellaneous things like dropped torches.
If you haven't yet, you may wish to read my guide on cheap minis to create a bunch of metal miniatures for cheap to use with the markers, read the Dungeon Master Lessons, or take a look at the other Dungeons and Dragons content.
Shout outs: Stacey, Alexa Hobusch, Jonathan Lekse, DMMichael7000, Ofelia Greer, Katie White, Subzotic, JollyGamer, Jayden wingler, Yi Tan, Phillip Brewer, Thoueris Zanzibar, Emma Holloway, Ashley Sullivan, Ghostfang1337, Gillian Tolbert, David R Abbott, S.T. Jenkins, Schoxmania Werks, Vanda Leipold, Brittany DeNicholas, Phillip Hash, Ly Anton-Blake, Amanda Kettles, Anthony Brown, Lou Bliss, Treighton, Pythor Sen, myrontheotter, Kassie Nicovara, Michael Isberg, Nat, Cory Evans, Krueger82, BestWorseCaseScenario, Damian Steele, Icarus Unleashed, Mark L, Lj Nielson, Conall Reilly, Alex, Violet Floyd, keith oneal rogers, Moss, William Bamann, Merissa, Patrick Natale, Cam Largent, Thaddeus Johnson, Siren, Donavan Guay, AstroLass, Jack Stevens, Chandlor Desper, Lizzie, Masca Boom, Jordan, Rincewind, Michael Hamilton, Rob Hale, Vedie V, Mylon Schroder, Nathan, Tiffany Mathis, Joseph Mitchell, Jordan Florez, Robert Rich, Robin Ellis-Foster, Deanna Pyle, Jess, Meme Pitt-Melton, E.D.F., Devon Bickel, Zee Livezey, Kevin, ryan scott, Christianna Schommer, Kerry Melton, Mary Kieser, SallySparrow132, Lunesolace, DJ_Kelf, Cassandra Keyes, Naomi B, Millergendraft, charles phillips, Nick Soucy, Ellen Mitchell, Melanie Warga, Jeremiah Walker, Bryan Kempka, chris wilson, Max Hops, Sarah Holland, Joshua David Maddox, Jennifer Smith, Ray Bissonnette, Joe Dalby, Nicholas Zamora, Yuki, ShortyMcgibble, mtnman1979@aol.com, KFB_Patreon, eric sun, Bruce Willison, Gundar Wez, Ken Shapiro, Matthew payne, Jacob Plummer, Nahellion, Serena Verden, bilbens baggo, Stuart, Brysen Packer, Galygious, Tim Mason, Maxwell Mayer, Gannon Dubay, Thobek, Aaron Teupe, Celso R Garcia III, Felix Schmäche, XMrMonkyx ., John, Miss Zilla M, RRare, Jordan Brazeal, Kyle Clark, Jake Lane, Adam Ruiz, Phillip P Torchia, Natalie Luttrell, Stefan Gottschalk's, Remora's Jewel, Dawnwolf, Buffonturtle, Christina Majchrzak, jeremy baisch, Ivee Quinn, Zealot23, Shane Andrews, CJMAXP, Chevy Jones, KingHavok1217, Shazear, Curran Vallejo, Steve Rosenlund, Leanna Orr, Ezzela1891, John Nazario, Gary, Gordon Alexander Fallon, Jason Clark, Trey Vickory
Their contribution stands as a beacon of hope for all adventurers!


