The Ultimate Guide to Cheap Miniatures - Part 2
Creating the Icons
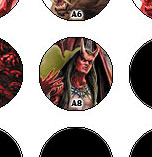
Firstly you'll want to put numbers on the icons so you can identify them in the field, which is especially handy if you use a combat tracker (like the one in my D&D section here). Start by putting your numbers down, be sure to repeat each number twice, once for each side of the washer. I kept my numbers pretty small since I didn't want them to take up much space, so I also limited them to two characters (1-99, then alphanumerics like A1, A2, etc), for a total of 349 unique minis, which I don't THINK I'll need more of.

Once that's done you're going to want to give them an outer glow so they'll show up no matter what's behind them. For black numbers a white glow will contrast best.
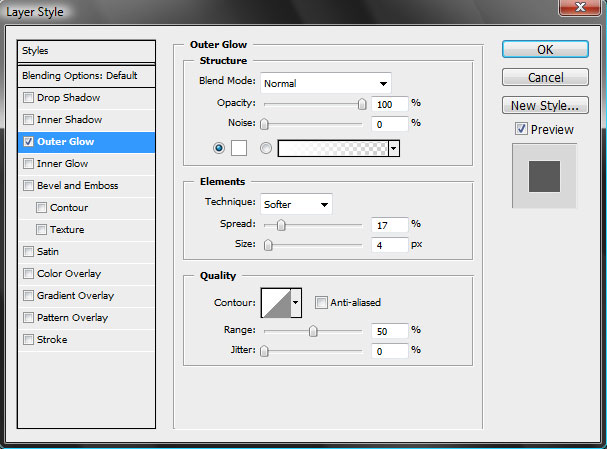
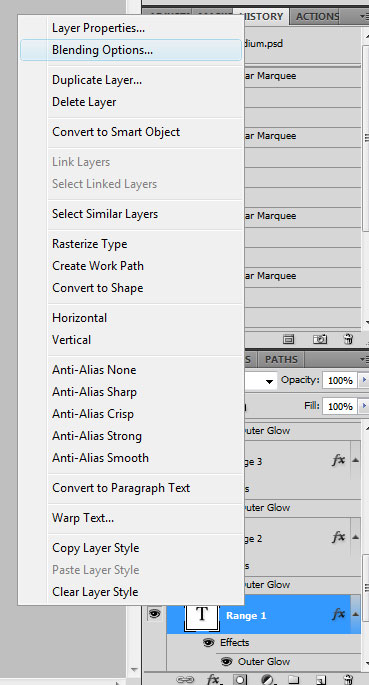 In the Layers window right click on your text field and select "Blending Options" from the list. In here you'll want to click and activate the Outer Glow option from the list on the left. The options I use for just a block outline are blending normal, opacity 100%, noise 0%, color white, technique softer, spread 17%, size 4px, range 50%, and jitter 0%. You can see all that below:
Now that we have all our numbers sorted out it's time to finally start adding pictures to the minis. Feel free to use whatever source you like for your pictures, I like to get a bunch of different sources, especially for common enemies (like goblins) so you don't get a lot of clones. Once you've got your image copy and paste (or open) it into Photoshop in a new file. Then, select the Crop Tool (C) and under the options at the top set the dimensions to the size of your minis. For medium size creatures, we're using 1 inch by 1 inch, so put "1 in" into both height and width, and make sure the resolution matches the original document. This is what I was referring to at the start when we set up the templates. If you just downloaded my pre-made templates, set the resolution to 72, otherwise use a resolution that matches your template.
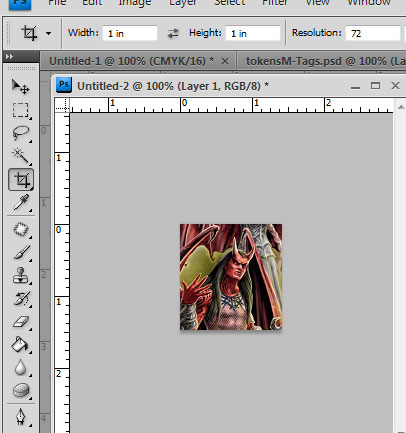
Now we crop; as you drag the tool it should automatically restrict you to the required ratio.
 Get as much of the picture as you like, but keep in mind this will automatically be resized to a 1-inch image, so if you select too much the detail will be lost. I like to make sure to get the face and enough other details so you can determine what type of creature it is.
Once you're happy with your selected area hit enter (or click the check mark) at the top to crop and resize your image. If it looks bad just undo and try again until you get the size and detail you'd like. If you're using a really huge picture you may need to use the Zoom Tool (Z) and select Actual Pixels up top to see the true size of the cropped image. Now go ahead and paste it into the template.
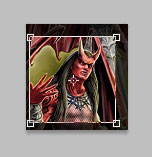
 You're going to want to manage your layers so that the picture you pasted in is below your transparent holes layer, this can usually be achieved by dragging the layer to just above the Background layer (click the layer in your Layers window and drag it up or down above or below other layers). Also make sure your numbers are above the picture so it doesn't cover it up. Now just nudge it around a bit so that there aren't any gaps at the edges of the circle (the arrow keys help for precise nudges) and you're done your first icon.
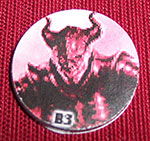
The one last thing you're going to want to do is make a bloodied version of the icon, so once the creature becomes bloodied you can just flip it over. The nicest way I find to do this is to colorize it. Start by going back to your cropped file that you pasted the original icon from.
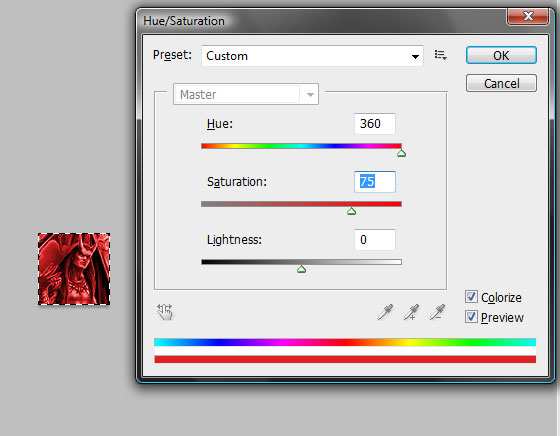
In that file go Image -> Adjustments -> Hue/Saturation to bring up the menu pictured above. In the bottom right activate Colorize and drag your Hue and Saturation sliders to get a nice bright red; the options I used are Hue 360 and Saturation 75.
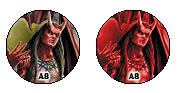 Once you've got it how you like, click OK, copy and paste the colorized icon into your template, and put it next to your other icon.
There! One fully finished miniature, if the red version of your mini didn't come out looking very red when you pasted it into the template, it's probably because the new file you made was set to RGB color instead of CMYK. Go back to the other file, undo the Hue/Saturation change, copy your cropped image, create a new file from Preset clipboard, set the Color Mode to CMYK, paste in your image, and do the hue/saturation change again.
Now all you've got to do is repeat that 24 or however many times and you'll have a full set ready to print. Just go File -> Print (ctrl+p), set your printer options, and print them out.
Cutting out the Minis
Once you have your sheet of minis printed out you'll need to cut them out, you can either do this with scissors (not really recommended, but if you do, glue first then trim) or a hole punch.

Hole punches can be acquired at any craft supply store, get a 3/4" or 1" depending on the size of your minis, I have two on the left in the picture above. Get whatever you can find cheapest, since it doesn't really matter, although one with a good "snap" to it will punch the holes cleanly.
 For example, the upper punch in my picture above always punches holes very neatly and perfectly, but the bottom one will sometimes leave a small connecting hair that I have to snip. Most if not all punches should have a way to see what you're punching through the hole, but just double check to make sure.
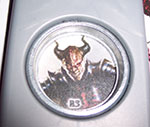
Start punching out your minis, cutting away the outer layers of paper as you make your way to the middle. If you're making medium size creatures with a 1 inch punch, the 1 inch washers you want will be most likely labeled as 3/8" flat washers, since they're marked by the diameter of their inner circle, rather than the outer. For small size 3/4" minis the washers will be labeled as 1/4" flat washers.
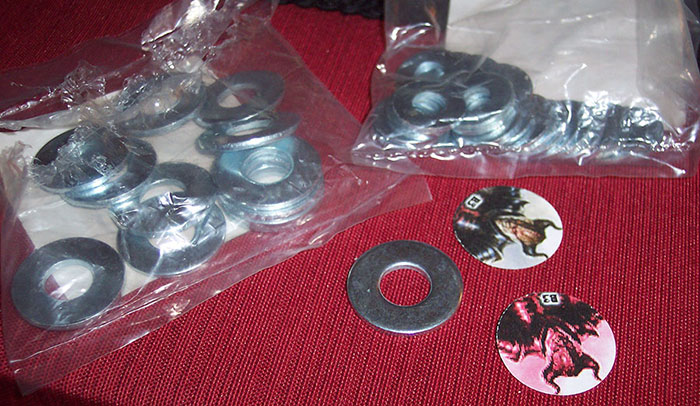 Yes, it's confusing, and you may want to measure them first since I'm sure you can find a tape measure to borrow at a hardware store, but if you're buying online double-check to make sure the inner and outer diameters are what you want.

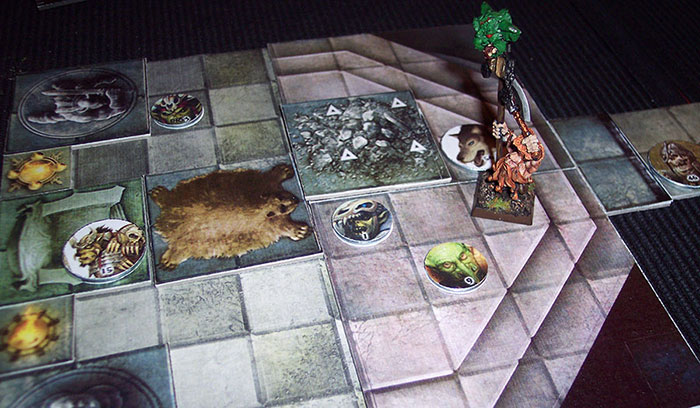
Now you'll want to glue the normal/bloodied version of your miniature on each side of the washer. For best results I like to run the glue stick over the washer and the back of the paper to ensure they stick firmly. They'll still rip off if you want to change them, but shouldn't fall off with use. If you're using scissors you'll want to cut them out with a bit of a margin, glue them onto the washer making sure to center them, then trim off the overlapping edges. Perfect! Now you have a properly sized mini that'll fit on your battle grid, be uniquely labeled to make your job tracking them that much easier, can be flipped when they switch to bloodied, and can be easily replaced by just ripping off the paper and gluing on a new one.
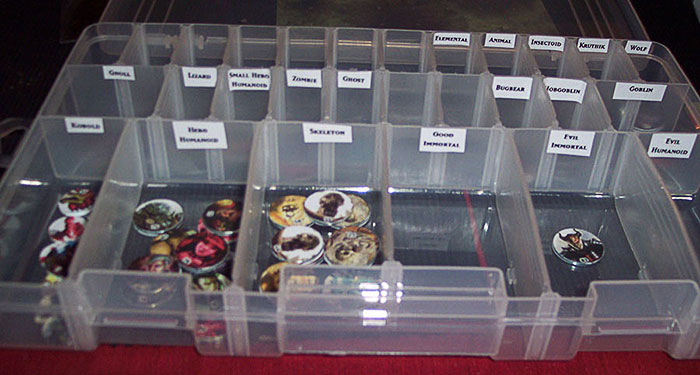
If you go ahead and make a ton of minis like me you may want to buy an organizer to keep them sorted, which you can get for around $10. Now just play! You can make minis for your players too pretty easily and they'll be pretty happy to have a nice personalized picture of their character, but my players like to have fancy models they can keep and be proud of, and it makes them stand out more in the field.
If you haven't yet, you may wish to read my guide on reusable status effect markers to create a bunch of magnetic status markers for cheap to use with the miniatures, read the Dungeon Master Lessons, or take a look at the other Dungeons and Dragons content.
Shout outs: Stacey, mike richard, HilloDark, Brian Tanner, Armand Desharnais, Trev909, Bob Goode, TODD RICHARD, Iofire, Caitlin W., Damon Carrington, Mario Pizzamiglio, Phil Mehl, Wesley Muncy, elijah D. maben, R., bruschkin, Vincent Drone, thea musing, Brian Nunziato, Matt Yates, Elisa Martinez, Ryan Flagg, Jade Arrowood, Angelo Anderson, Syn21, Dave Walker, Jonathan Lekse, Katie White, JollyGamer, Tiernan Greenman, Burlyfighter, David R Abbott, Rick Marsh, Brittany DeNicholas, Amanda Kettles, Lou Bliss, Sik Makoyi, Pythor Sen, Bryson Waits, Desedent, Irate The Pirate, Mark L, Siren, AstroLass, Lizzie, Michael Hamilton, Vedie V, Mylon Schroder, Nathan, Jordan Florez, Robert Rich, Jess, Zee Livezey, Kevin, Kerry Melton, SallySparrow132, Millergendraft, Federica Frezza, Nick Soucy, Jeremiah Walker, Bryan Sheairs, chris wilson, Max Hops, Sarah Holland, Joshua David Maddox, Jennifer Smith, Liz Fontain, Ray Bissonnette, Joe Dalby, Matt Price, Nicholas Zamora, ShortyMcgibble, Mr. Vinclair, mtnman1979@aol.com, KFB_Patreon, eric sun, Gundar Wez, Nahellion, That Video Editor Nic, bilbens baggo, Stuart, Brysen Packer, Maxwell Mayer, Thobek, XMrMonkyx ., Miss Zilla M, Jordan Brazeal, Kyle Clark, Jake Lane, Phillip P Torchia, Stefan Gottschalk's, Remora Jewel, Connor, jeremy baisch, Daniel Edwards, Zealot23, Shane Andrews, Brandon Mußiq, CJMAXP, Festus, Lisa Tucker, KingHavok1217, Mx Charlie, Justin Snyder, Zachary Burgess-Hicks, Steve Rosenlund, Ezzela1891, John Nazario, Gordon Alexander Fallon, zachary gee, Jason Clark
Their contribution stands as a beacon of hope for all adventurers!

